Pages

Showing posts with label Garden. Show all posts
Tuesday, July 24, 2012

Squash Bugs!!

Our garden has been doing so good-- the zucchini plants have produced a lot already, we love them!  But tonight when we went out to check on things....... we found SQUASH BUGS!!!

This is what our plant looked like yesterday


and this is what it looked like today, really it happens that fast.  Clair knew what was wrong with one look at this plant- it's happened before....

YEP!!! We've got squash bugs, and they can take out a plant in a couple of days.  If your plant looks like it is dying, turn the leaves over and look on the back side of them.  These are squash bug eggs, and we found them on A LOT of the leaves.  

 Instead of spraying the whole plant to kill them, we've found the best thing to do is cut the leaves off and dispose of them.  You don't want the eggs to hatch or you will have BIG trouble in your garden.  Clair found one adult bug, but by the time I went in to get the camera he smashed it.  What was he thinking? lol I wish I could show you what they look like because if you find them on your plants you want to get them off.  Anyway within a couple of days the plant will be as good as new- and the leaves grow back too.    
Here is a post update!!  We found one of the bugs tonight , this is what they look like.  Ugly- and they can take out a plant in a day!! So watch for them.
Wednesday, July 4, 2012

Growing and Freezing Basil

First let me just say that I am NOT a master gardener... but I have learned a few things over the years, and that is all I am sharing with you today-- some tips that work for me.  So with that being said- here are some things that have helped me when it comes to growing Basil.
I LOVE to use basil in my cooking, nothing tastes better than fresh basil.  I went out to the garden a few nights ago, and one of my plants was going crazy.  This is what it looked like--- I will show you in these pictures how to prune a Basil plant so that it continues to produce for you the whole summer.
I know it is hard to use that much basil everyday.. but you want to prune the plant because then it will keep producing more. (for every leaf you cut- 2 more will grow)  So I am also going to show you how to freeze it so that you can use it all year.


you don't want to let flowers grow on the plant, because then the flavor isn't as strong- so clip them off before they bloom.

the plants have a lot of stems, that look like this- you want to always keep at least 2-3 leaves on each stem.  Just grab a leaf and cut it off- continue doing this on the whole plant

see this is where I had cut a leaf off before and now you can see that there are 2 growing back.  By pruning  you will cause the plant to bush out instead of growing straight up.

and this is a picture of the same plant after I had pruned it back... I could still cut a few more off, but I like to keep some on there so I can cut fresh off to use in between cuttings.  I wish I knew how to post the first picture & this one side by side so that you can see the difference- sorry you're going to have to just scroll up to see the before and after effect.
 After you have pruned the plant, wash the leaves and cut the stems off of them- you can see I haven't done that yet in this picture, the stems are still quite long.    Once you have done that you can either use them now or put a few in a container in the fridge to use in the next few days.   
If you want to freeze the basil, this is the best way I have found to do it.  I know there are a few different ways to freeze basil, this way just works for me.

First take 20 leaves ( I figure lrg. leaves, so if there are a few smaller ones count 2 as 1 leaf)  I have always done 20 leaves because that's the amount I use for my Tomatoe Basil Soup and it's a good amount to add to sauces and things when your're cooking.  Put the basil leaves into your food processor and add 2 tablespoons of olive oil, chop it up
then scoop it into a snack size baggie-- it fits perfect!  I have sealed them in my food saver bags before, but I couldn't tell a difference - so now I just use the baggies, try to squeeze out as much air as you can.

Then I put the bags of basil into one of these plastic containers in the freezer- they are the ones you can get for $ 1.00 at the dollar store or walmart.  And yes it looks like I need to defrost the freezer-- it's the job I dislike the most, so it's not happening today!!  :)   Put a label on you boxes so you know what is in each one.

I wanted to show you how beautiful it looks after being in the freezer for a year.... the one on the top is a bag from last year, and the one on the bottom is the one I did today.   The olive oil helps it keep it's vibrant green color -- You can make the best basil pesto ever!!  I hope this has been helpful, and if you've never tried to freeze herbs I hope you will give it a shot!!  You'll be surprised how easy it is.   

c
Thursday, May 17, 2012

Garden Cages

I wish I would have had this post ready a few weeks ago-- I know a few years back we took pictures of this whole process from planting to harvesting, but I can't find the pictures anywhere.  I wanted to post this eariler so that you would have time to see it before you started planting your gardens, but welcome to my life!!! haha  So this is the best I can do... We have been doing our garden this way for about 15 years and we love it.  The plants grow up tall and the vegetables are off of the ground, so they are easy to pick.  I don't have any pictures showing you what the plants look like when they are fully grown, so you will just have to believe me when I say it is amazing.  I will post pictures as the plants grow--  But for now lets get started.....
First you need to buy a roll of this fencing, we just call it farm fence you can buy it at Lowes. It has squares that are 2 inches by 4 inches wide.  We use the 3 ft. high size for our cucumbers, and cherry tomatoes.  For our other tomatoes & the peppers we use the 2 ft, height.   You will need a measuring tape & needle nose plyers/cutters.


For each cage you need to measure 7 ft. of fence, you can see in the picture that 7 ft. is right on the wire- but you want to go 1/2 way into the next square to cut it, then you will have a small piece of wire on the end to wrap around & secure the cage together  Doing it this way you will get 7 cages per roll of fence.


after cutting the fence, form it into a circle & with the needle nose plyers twist the small piece of wire around  and continue twisting it tight to secure the cage all the way down the side.


when you are done you will have a 2 ft. or 3 ft. high- round cage, it will look like this

 Next after you have tilled the garden area well push the bottom of the cage into the dirt where you are going to place the cage... leaving a circle in the dirt this way


once you have marked where the cage is going to go, you can dig a shallow hole, pulling the dirt up into a mound around the outside edge of your mark


place your cage inside so that it looks like this, and now plant 2 tomatoe plants on the OUTSIDE of the fence- across from each other on opposites sides. I thought I had a picture of the two plants, but apparently I didn't-- if you scroll down a few pictures you can see how they are planted


we then cover the smaller plants up with a milk jug, this makes it like a green house and will help the plant to grow faster. When the plants start to fill up the jug- remove it from the plant

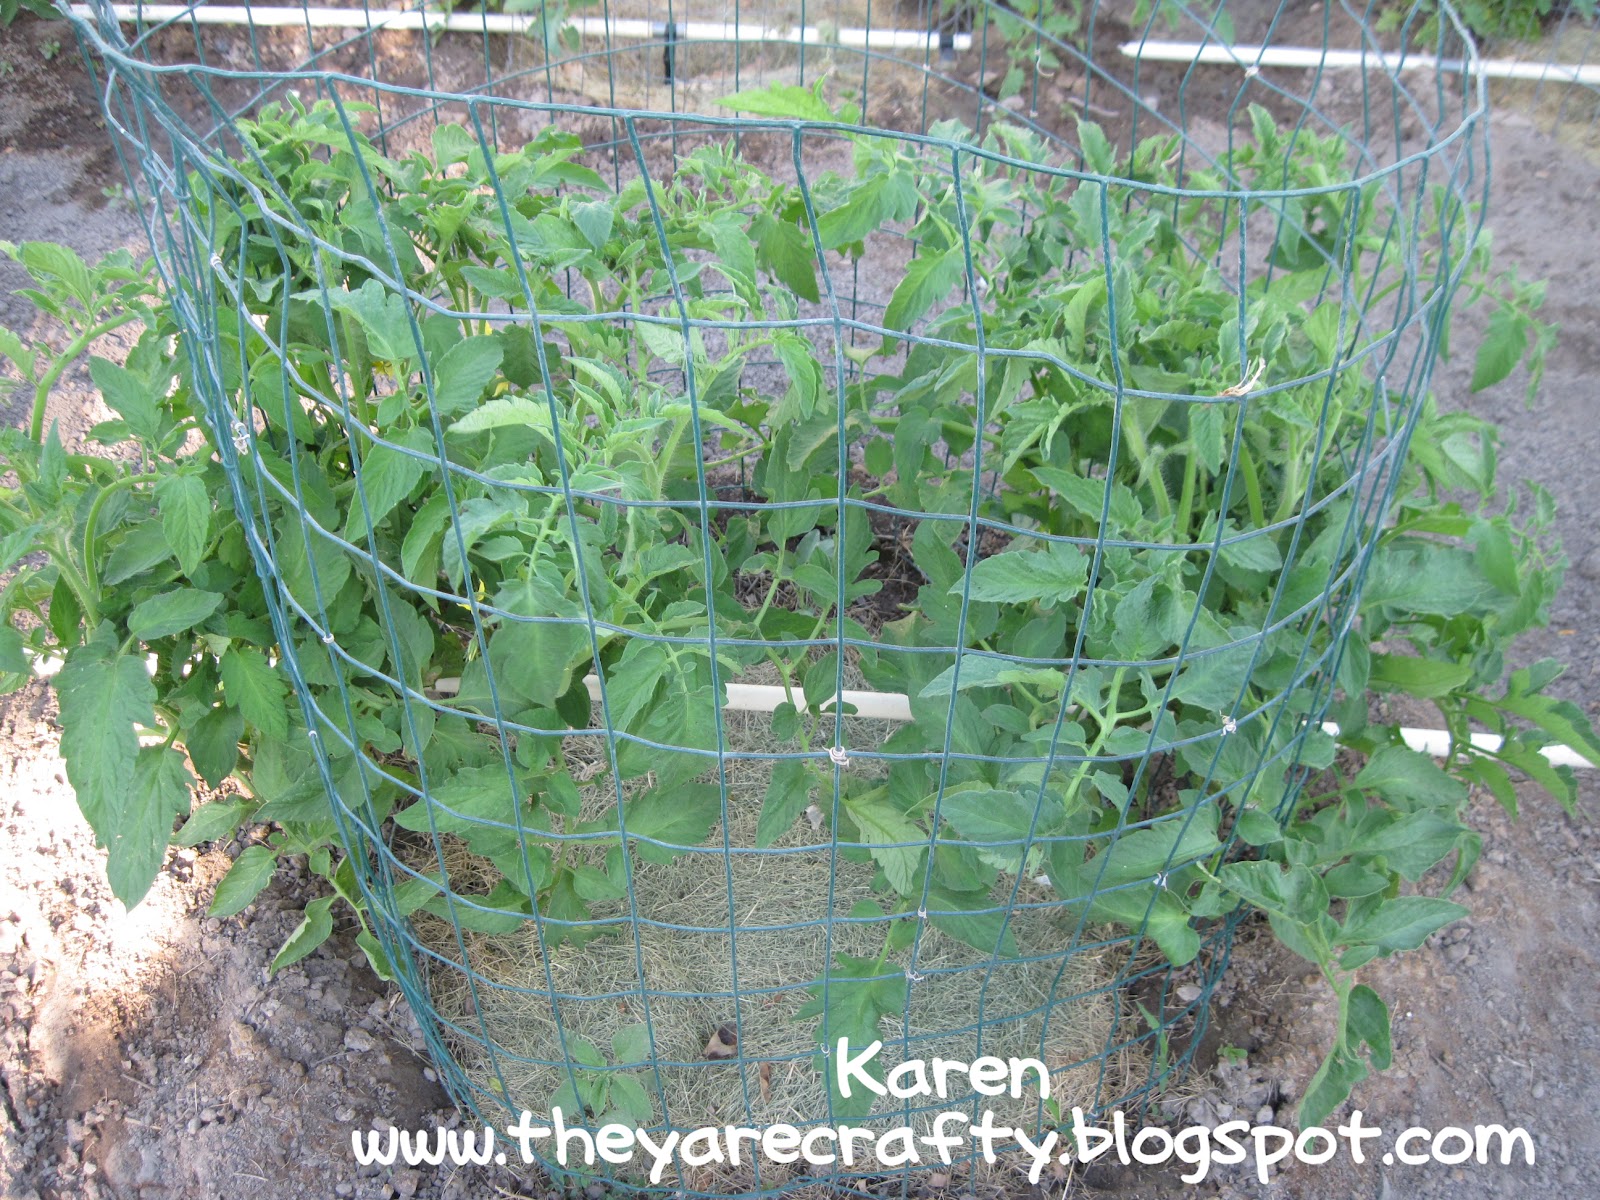
these are larger plants & don't need to be covered with a milk jug, as the other plants grow to this size you place the stems & leaves inside the squares and help them to grow up the cage


then for the next few weeks after mowing the lawn we pour the grass clippings into the center of the cages, this helps the soil retain the moisture when you water them


this is a picture showing you how we plant our peppers-- because they grow into smaller plants that the tomatoes you can plant 4 to a cage-- again look to see how they are planted on the OUTSIDE of the cage


with the cucumber plants only plant 2 per cage, and weave them into the fence squares as they grow- they will climb the cage & the cucumbers will hang down making them really easy to see and to pick


so here you have the result of 10 hours of work on a beautiful summer day!!!!  I can't wait to have fresh produce from the garden.


This is how we take a piece of PVC pipe and place it through the cages- there are holes drilled in the pipe so that it waters each plant. 


Here is a picture of the tomatoe plants after they have been growing for about 5-6 weeks.  They will start to fill in the cage