Pages

Sunday, April 29, 2012

DIY Pillow Covers

I have been looking for a cute pattern for my front room for a long time. I didn't know what colors I wanted to anything. Finally I found this really cute  pattern at JoAnn's and decided to make some pillows.
-First measure you pillow. I bought a travel size pillow at Walmart. It was about $4. It is 14 inches by 20 inches.
-I bought 1 1/2 yards of material at JoAnn's. I wanted to make two pillows with this pattern.
-My pillows are 14 inches by 20 inches. I found a pattern online but I changed it a little bit. Muiltiply the length of the pillow by 2. So my measurements are 14 inches by 20(2)inches. So it will be 14 inches wide and 40 inches long.
-Measure your fabric and cut. 14 inches by 40 inches. Make sure your lines are straight.
-Now hem the two short sides. Lay the fabric right side down with a short side towards you. The hem on each side is 1/2 inch. I ironed it, pinned it and then sewed it.
-Now, lay the fabric so it's facing you. Fold each side inward and now the fabric side is on the inside. Fold over the fabric until it measures the length of the pillow. I got my ruler out to measure it. Then I pinned the width of the pillow so that I could sew it.
-Sew your pillow and turn it inside out and your done. These pillows are so easy and so cute.

I hope you enjoy making these cute pillows!!!!


Saturday, April 28, 2012

Baby Girl Shower


I had such a fun time last night and today getting ready for this darling Baby Girl shower for one of my friend's step daughters!!  See for yourself...it was a success... the Mom to be was so excited-- she is darling & my friends home was the perfect place to host such a fun, exciting, happy time!!!!


 You know how I LOVE chocolate dipped oreo's.... you can never have too many of those yummy things

 I am so hooked on the glass jars to display the vegetables in.....

 as I said you can never have too many oreo's-- I like to have them on a platter to eat while the party's going on... the other ones were wrapped in little plastic bags, so they can be taken home to enjoy for a midnight snack... or eaten on the way home if you're like me & have no will power... Love these plates we found at TJ Max!!! the ribbon makes them so darn cute......
 And here is the darling Mom to be.... enjoying the spread... she is going to be a cute Mom!!!

 Raspberry filled cupcakes with WONDERFUL butter cream frosting.. with vanilla & almond extracts!!
 I decided to make the "bubble bath" punch PINK instead of blue.... so cute & tasty too....

 lot's of yummy food, the chicken salad was to die for--- don't think I'm ready to share that secret recipe yet.... I'm going to indulge it a few more times & try it on a few more people first..... then MAYBE I will let the recipe out of the bag, you're just going to have to believe me when I say it is good & healthy... no mayonaise here!!

 The banner Jamie made was so cute... Baby Pearl... how darling is that name???  I think we will have to start a little shop here on the blog... showing all the cute things Jamie can make...she is amazing!!! and makes me look so good!!

Oh the strawberrys were lovely... costco came through again!!!  They are so good with the pineapple recipe I have already posted on the blog... look it up & try it ..   such a fun day... and now I'm on my way out the door to go to my little Grandson's 4th Birthday party!!!  YES our life is one big party after another!!!!!
Friday, April 27, 2012

Sneek Peek


Here's a sneek peek at what I'm getting ready for this week-end....

Oh yumm.. I love chocolate dipped oreo's 

more pictures to come... but first I've got to get busy!!!!!!

Thursday, April 26, 2012

Baby Birds......


One of my favorite signs of spring.... if you have never watched the miracle of
these tiny little creatures, .


oh I hope you soon will have the chance to witness
how quickly they grow...
.
                                                          
                                                       it was AMAZING!!!!!

Wednesday, April 25, 2012

Trix Treats

 
These treats are made the same way as rice krispy treasts. But instead of using rice krispy cereal, you use tricks cereal. They just look like a party don't they?


Click the magic button for the full recipe


The little boys had fun making them....... and even more fun eating them!!!!!

Tuesday, April 24, 2012

How to clean a lamp shade

Okay I thought that I would start posting a " Helpful tip" once a week-- so of course Tuesday seems like the perfect day to do so.  Then we can call it " Tip Tuesday"  yes I know I am brillant!!! ha  Anyway, so now for the tip of the day.....actually I already gave you a tip this morning in the pasta salad post-- using the egg slicer to slice your olives, but I will still give you another one. 
To make dusting your lamp shades easier I use a lint roller-- in fact I keep one in the drawer of the sofa table then it's handy.  Just roll it along the shade from top to bottom, you can even roll all the way around the top & bottom to get that little lip.  The dust comes right off onto the roller & not onto the floor!  :)

Italian Pasta Salad


I made this salad for a farewell this week-end, it's yummy &  pretty easy to make- the bowl came back empty... so that's a good sign!! To get the recipe click the magic recipe button on the bottom


Look at all those lovely colors!!

Click the magic button for the full recipe

There are so many options for this salad-- just add the things your family likes-- it looks so fresh & pretty.
I like the taste of whole olives better than the ones that are all ready sliced in the can.. but they do take time to prepare them.. so if you didn't know, here's a tip for slicing olives.  I love to use the eggs slicer to cut them, you can do two at a time & it really doesn't take long.  I also use the egg slicer to cut strawberries- it works really well... so there ya go, your tip for the day!  I'm sure this salad will be made at our house a lot this summer!!


Monday, April 23, 2012

Cinnamon Bear Popcorn Recipe Card

Here is the recipe for the tutorial I posted yesterday.  I add 1/2 tsp. Cinnamon oil... that is not on this recipe card, so make sure you add it if you want a little flavor-- or add more if you like it hotter!!
Sunday, April 22, 2012

Cinnamon Bear Popcorn

This week-end I made one of our favorite treats! Cinnamon Bear Popcorn. It's a great yummy treat for anytime!!


Click the button for the printable version with all of the measurements!

After it has cooled, break it into pieces, put it in a sealed container & enjoy!! I am pretty sure this will become one of your favorite treats too!!
Saturday, April 21, 2012

Energy Bites

Need a mid-day energy boost??? Well here are the perfect little bites of energy for just such an occasion. They work up really fast & taste good! The little boys will even eat them. They make a perfect snack and keep in the fridge for a week.

Friday, April 20, 2012

Gel Bag

I found this really neat way for kids to learn. Both of my boys are hands on learners. So when I saw this I knew that I had to try it. I found this on playathomemom3.blogspot.com
It's very easy to make, entertaining and educational.

All you will need is:
Gallon Ziploc Bag
Hair Gel (bought at dollar store)
Glitter (bought at dollar store)
Food Coloring
Open the Ziploc bag and put the hair gel, glitter and about 10-20 drops of food coloring. You might have to add more food coloring depending on the color you want. I tried to match the gel to color of the glitter.
Next, zip the bag and mix everything around. Kids will have fun playing with this. My boys LOVE it!!!!
Thursday, April 19, 2012

Easy Foil Letters

I was at the craft store the other day and came across these cute letters. I knew I wanted to put this in my family room but I wasn't sure what to do with it. I then decided to try this and see if it would work. It's so EASY and very CUTE!!!

Things you will need:
Aluminum Foil
Mod Podge
Foam Brush
Black Paint
Paper Towel


1. Rip pieces of aluminum foil. They don't have to be the same size.
2. Put mod podge on the letter (use it like glue), then put the aluminum foil on top.

3. After you have covered the letter with aluminum foil, cover the letter with mod podge. This will help the foil stay on. You might have to do a couple of layers. It just depends on if the foil is coming off or not. Let it dry.

4. Next get your black paint and paper towel. All I did was crinkle the paper towel in my hand and dab the paper towel in the paint. Just a little bit of paint goes a long way. The paint dries fast so done put a lot of paint on the paper towel.Then you just want to dab and rub the black paint over the letter.

5. Now just put a layer of mod podge to protect it and your done!!! This is what the letter looks like on my shelf.
Wednesday, April 18, 2012

Our Favorite Granola

Click the magic button for the full recipe with nutrition facts!

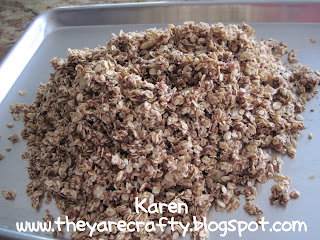
Oh how I LOVE homemade granola.... this is one of our favorite things. I usually make it every couple of weeks-- We like it for Breakfast in a bowl of milk, or sprinkled on yogurt or fruit & added to our smoothies. I take bags of it in the car just to snack on.After you click the magic button for the recipe... Here's a tutorial on how to make it!!!


Mix everything together.... put it on a cookie sheet & bake


After it has cooled, throw in your add-in's

And then scoop it up and put it in a CUTE jar-- and you are going to become addicted to it too.


I hope it becomes one of your favorites too!! Let me know what yummy add ins you use in yours, I'm always looking for a new twist on this.


**For those of you who might not know-- make sure you mill or grind your flax seed, don't use it whole. :)

Petals of our Life Jar

I started doing this about 29 years ago... when I first started I had a large basket that sat on my coffee table in the living room. (well the living room was the family room too- you know they say love grows best in a small house!) Anyway as time went on I had to change containers as I added more & more petals. So here is how it works-everytime any of us (my family) recieved flowers, for valentine's, Birthdays, babies, funerals, school dances, graduations, weddings ect. I would keep some of the petals and put them in the jar... and soon we began to refer to this jar as the petals of our life. This is the Jar I have had them in for 6 years, it sits on the dresser in my bedroom


this jar has become something that has a lot of meaning to me.. as I reflect back on all the occasions for the petals, they represent some of the most joyful & hard times in our lives-- they tell a story-- our story. And I am amazed at the emotions that can come back with just a glance.